Imagine, your much-awaited dessert finally comes — a plate of stacked fluffy Japanese pancakes, softly jiggling as they're set down on your table. Just a glance of the delectable dish dressed in light whipped cream and fresh mixed berries makes it incredibly hard for you to stop yourself from digging in. But you hold back, just for a second, and try to memorialise that exact moment you fell in love with the plate. You take out your camera and you snap — only to find that it doesn't look half as appetising on screen as it is in real life.
If you find yourself in these situations often and you just want to do justice to the great food that's been served, well we're here to help. To help boost your #instafood game, we've asked some pros to share food photography tips you can apply.
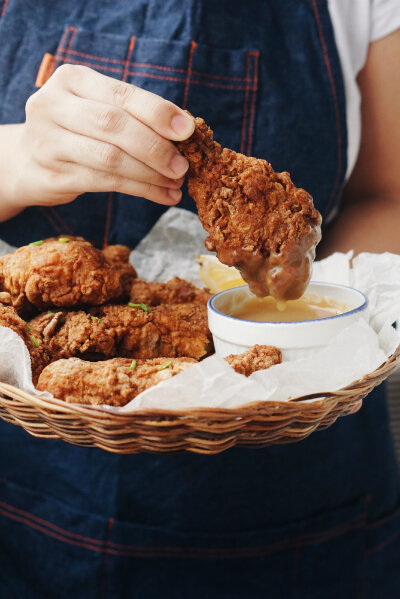
It doesn't matter whether we love the dish or not — only if it's really captured well does it make us truly drool. (Photo from: eatsplorations.com)
SG-based professional food photographer Brian Xavier Bong or @thefussyfoodie_ on IG, food stylist and multi-hyphenate creator Soo Yin Goh (aka Sycookies) from KL, and food-loving Filipino couple Mark and Bianca behind the blog EATSplorations share some tricks that will help you get those yummy snaps on your feed.
Tip #1: Mind the light and shadows
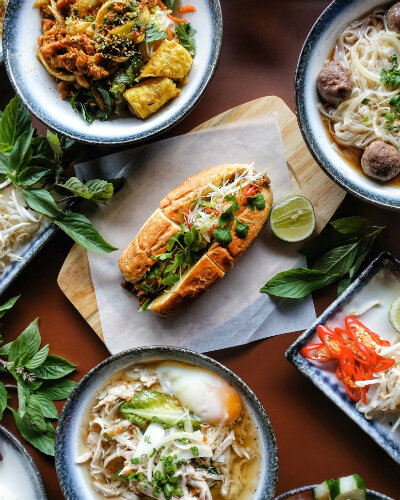
Use the light and shadows to your advantage as they help draw the eyes to your food (Photo from: @sycookies)
When taking photos of your food, it's important that you pay attention to your lighting. Shooting in dimly lit places won't do well to show your dish at its finest. The rule of thumb is "always shoot with natural light aka Mr. Sun", according to Mark and Bianca. They always shoot around 11 a.m. to 1 p.m. where the sun's at its highest.
Meanwhile, if you're indoors, Brian advises to shoot by a window or space where natural light comes from. "You want to try to shoot perpendicular to the direction of the light so that you get a nice contrast of light and shadows," he explained. This is because shooting against the light will only darken the photo. Brian added, "Sitting close to natural light can also add dimension to ‘boring’ things such as plain soups and sauces."
And of course, when there's light, there's darkness too. So make sure you take advantage of the shadows as well to draw more attention to your food. See how Soo Yin captured the Vietnamese spread above. "There were two main directions of light — from the back and the side — and this top angle shot would capture the shadows to create contrasts and have the food stand out," she illustrated.
Tip# 2: Control the tones
The sun always helps, but Brian also notes that you should observe how its intensity affects your photo. "The intensity of the sun can result in varying tones of contrast," with the sun during the morning, late in the day, and cloudy days offering softer contrasts, while taking a photo on a sunny afternoon can result in harsher ones.
If you can't control the time, then your positioning can still help. In the post above, Brian sat over and took a photo at the counter by the window. "You can see that the dish gradually becomes less bright the further it is from the window," he pointed out.
On the other hand, if you have all the time in the world but are unsure of what kind of intensity to go for, aim to shoot your food under soft light. With its soft shadows, this lighting can go well with any mood as it complements the food well, according to Soo Yin. "[Soft light illuminates] the texture and details in food while revealing the dimension and giving the most realistic of what the food presents," she highlighted.
Tip #3: Know that less is more
According to Brian, when you're indulging on a feast, you might think it's a waste not to include everything in one shot. Instead of capturing the delight of your spread, however, he explained that "too much clutter could make a food shot look unappealing, regardless of whether you choose to do a flat lay or angle your shot in any way." As such, he suggested to just pick one dish that stands out more to you and frame it in the mid-ground of your photo. "It does not necessarily have to be the best looking; it could just be the one that you’re most excited to try or enjoy the most," Brian said. For a busier composition, you can add other dishes or objects in the background or foreground so your dish is framed in a minimal way without distracting from the subject.
But why should you take the time to carefully consider what to include in your frame? Well, Soo Yin summed up the importance of styling, saying, "Choosing the right composition can tell a better story than having something random or totally irrelevant to the food presented as the star in the photograph."
Tip #4: Be resourceful
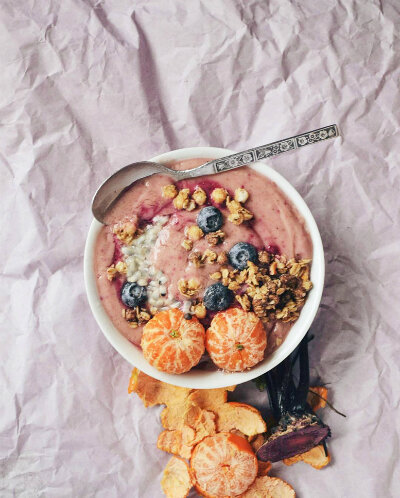
This photo of a smoothie bowl highlights the fresh and healthy ingredients used in creating it (Photo from: @sycookies)
If you've decided to add extra details to your shot, Mark and Bianca encourage you to "use what you have or other props related to the food you're shooting." Seeing this connection between the objects you've featured will further help people focus on your main subject, the couple explained.
This is easy enough when you're enjoying your food at home and you have extra ingredients readily available. Soo Yin said you can opt to use the raw ingredients or even the prepping tools used as props. In the photo above, we see oats, nuts, and berries sprinkled on top of a healthy bowl of smoothie. But aside from those, she also showcased ingredients such as beets, oranges, and so on which we don't really see in the food itself. "This way, we know this bowl would also have the goodness you are getting from beetroot," she pointed out.
Including tableware or décor readily available can work too. But — keep in mind — you should only do this when it's permitted. If you're eating out and you're taking a photo of your food in a restaurant, Brian reminded, "Please do not shift things around unnecessarily or without permission!" These public spaces are not our homes after all.
Tip #5: Add a human element
If other objects are not an option, well, you can always insert yourself, or a friend, in the photo. If you're shy, don't worry — we're not exactly telling you to smile beside the food. But you can try having a hand interact with your dish, because, as Brian said, such actions make the photo more dynamic and engaging to the viewer. "Including human interaction in a shot can create a sense of being present where the shot is taken towards the viewer," he expounded. In short: this enables your audience to experience the meal vicariously through your photo.
Aside from getting your friend's permission first if you're planning to include them in the photography, Brian also emphasised to "make sure they pose naturally, else that awkward hand is going to get more attention than the food itself." If capturing an action such as pouring and sprinkling, he recommended shooting in burst or continuous mode. It's difficult to do a take two in these kinds of photos, and doing multiple shots help ensure you'd have at least one decent and clear snap.
Tip #6: Focus on the food

Food should always be the centre of attention (Photo from: eatsplorations.com)
Finally and most importantly, as Mark and Bianca emphasised, remember: "Food is always the hero." It doesn't matter if you have such great hand modelling skills or you have props that heighten your photo's aesthetic if, ultimately, they take the attention away from your fare. Even Brian agreed, saying, "Sometimes, just letting the star take centre-stage works best." Going with minimal framing won't do you wrong.
When you do this, Mark and Bianca said, "Make sure to feature the food's sexy side. Let your readers drool every single time." If you're having a quarter pounder with four kinds of cheese melting on its juicy patty, then capture it through an angle that helps show these qualities best.
Tip #7: Make your edits
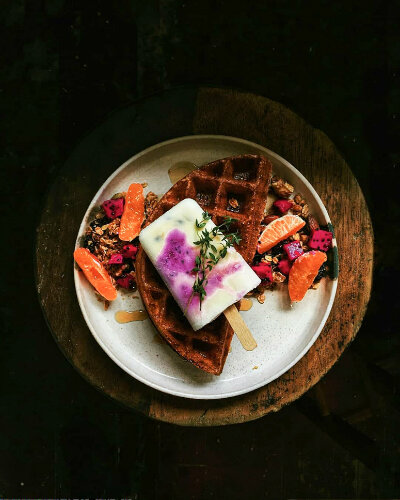
Tweaking the lighting and tones of your photos can help intensify, and therefore, emphasise the colours of your food (Photo from: @sycookies)
When all the shooting's done, and after you've finally munched on your meal, take a bit of time to do some editing prior to posting. After all, as Soo Yin said: "The magic wand for all photography is obviously the use of editing software. While your gears determine the quality of the images, post-editing determines how it should look better with manipulation of tones and colours." Her personal go-to is Adobe Lightroom, where she can easily make changes with the colour and lighting to highlight the dish better. "A simple vignette would draw focus to the middle and increasing colour saturation," she said. It can be great to make the colours pop, as was the case in the picture above that was shot on mobile with no artificial light.
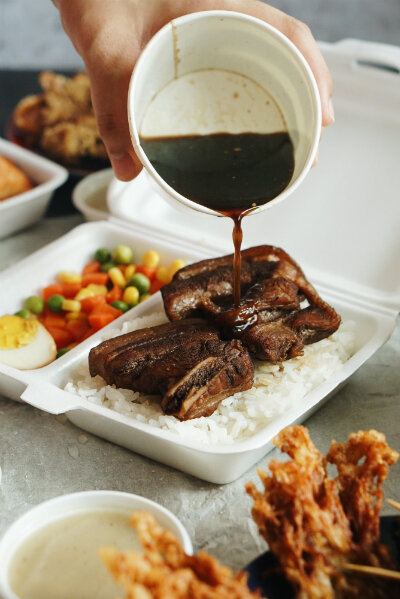
Keeping these food photography tips in mind will help you shoot a mouth-watering photo that'll be the subject of everyone's envy (Photo from: eatsplorations.com)
So, you see, capturing great photos of your food requires a number of careful considerations and — not to mention — effort. The next time you eat out (or order in), keep these food photography tips in mind. As Soo Yin said, "Mastering these basics often not only helps improve the quality of work" but also helps you adapt to the challenge of shooting the variety of foods out there. Take it step by step and you can work towards having an exquisitely appetising grid in no time.
Comments, questions or feedback? Email us at [email protected].


