While it’s not the most pressing issue during this stay-at-home period, maintaining grooming habits is still important. Not to mention it's something that we may need a little help with now that we can’t outsource these beauty services like we normally do. Ever since booking for a manicure, brow shaping and eyelash extension sessions and so on have become out of question, we've been left to our own devices.
So what now? No worries because help is on the way. We asked grooming experts to share their tips on how to DIY beauty services for now. Keep reading to learn how to shape your eyebrows, do your nails and remove eyelash extensions safely and properly.
How to keep your brows in tiptop shape
If you're used to getting your brows groomed by a professional, you may be getting a bit anxious now that it's growing out of shape. But the good news is that this is easily fixable. All you need is a good pair of tweezers, some non-permanent markers (a brow pencil will do), mini blunt-tip scissors (or brow scissors if available), brow brush and a dash of courage.
Follow Benefit Singapore's National Brow Artist Rochelle Paz's step-by-step guide to beautiful brows.
Step 1: Find your perfect brow shape.
"The easiest way to personalise and tailor any brow is through a three-step custom technique called Brow Mapping. Simply take your favourite brow pencil and make these three measurements to find the shape that best fits your face. We'll use the nose as the point of origin to map out both brows. Using the same point of origin for both brows will help you create symmetry and balance.
First, find the Start. Measure straight from the dimple of the nose to the beginning of the brow and make a mark.
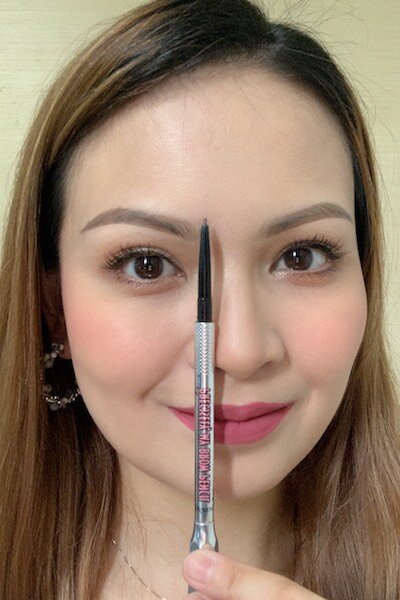
"Straight from the dimple of the nose to the beginning of the brow"
Next, look for the Arch. Beginning at the edge of the nose, we pass through the pupil to the highest portion of the brow and make a mark.
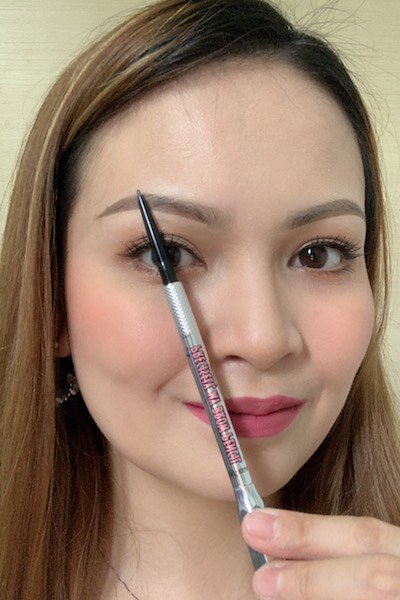
"Pass through the pupil to the highest portion of the brow"
Finally, identify the End. Measure from the outer edge of the nose past the outer corner of the eye and make a mark.
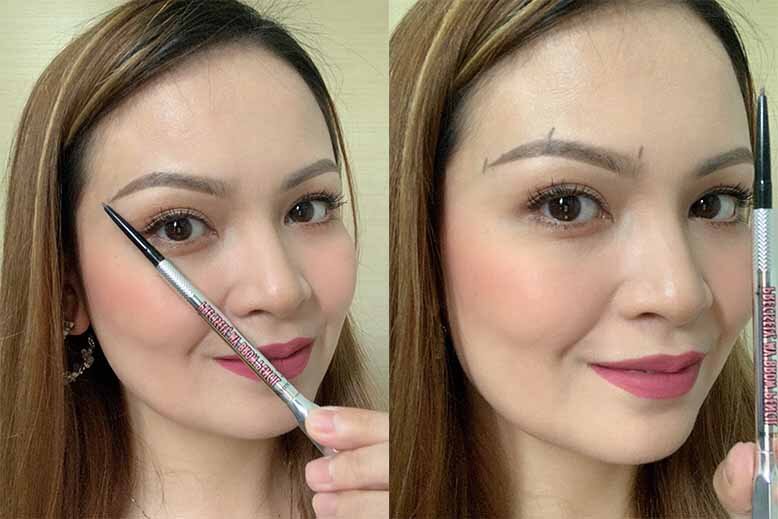
(Left) "Measure from the outer edge of the nose past the outer corner of the eye". (Right) How the marks should look like.
After you’ve made those marks, use a brow pencil to sketch a few lines to connect each mark on the top and the bottom of your brow. Hairs that fall outside those lines are the ones you should tweeze and the ones that are inside the lines should stay."
Step 2: Trimming.
"Take a clear brow gel (I like using the Benefit 24-HR Brow Setter) and brush the brow hairs upward towards the hairline and out towards the temple. Let the gel dry completely then trim only the ends that are sticking too far out past your desired shape."
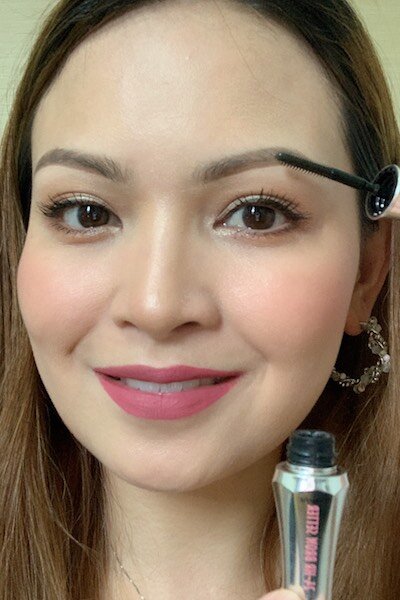
Brush the brow hairs upward towards the hairline and out towards the temple.
Step 3. Tweezing.
Now, the real work begins. For tweezing, Rochelle shares her dos and don'ts.
"Always use natural lighting. If possible, tweeze near a window with even lighting on your face. Use a microliner (try Benefit's Precisely, My Brow Pencil) to fill in your brow into the desired shape before you remove any hairs. This step allows you to see which hairs need to go and which ones need to stay. Then, pull the skin tight with one finger and tweeze the hair in the direction of its growth. Typically, that direction is upward or towards the temple versus straight out away from the face.
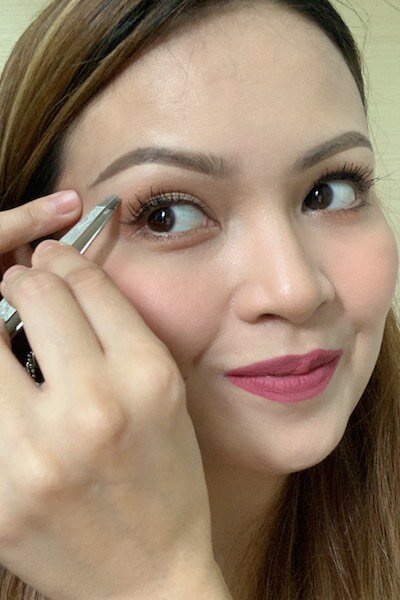
"pull the skin tight with one finger and then tweeze the hair in the direction it is growing"
Avoid tiny magnifying mirrors because you can see only a field of tiny hair versus the actual shape and don’t remove hair in the wrong direction. Many people believe that they tweezed too often, when in fact, they tweezed improperly. Each brow hair is connected to a tiny blood vessel (derma vessel) that keeps it healthy and allows it to grow back when the hair is removed. Tweezing in the wrong direction or against the direction of natural growth can cause that vessel to rupture.
That's it! Keep your hands and patience steady and you're good to go."
How to clip and care for your nails
Nail and hand care are especially crucial these days when we're constantly washing our hands and rubbing alcohol so we don't end up with dry, brittle fingernails. We got in touch with two nail experts, Rebecca Chuang of Fluttery Tips, a popular nail salon in Singapore, and Faye Espocia, the operations manager of Posh Nails, a pioneer in the natural nail care industry in the Philippines. Ahead, their advice on how to maintain comfortable nail length, deal with an overgrown manicure, remove nail extensions and more.
How to properly cut nails?
Rebecca advised that about one to two centimetres of the free edge (white part) is a good length to cut your nails. "Overtrimming will inevitably result in a shorter nail bed," she said.
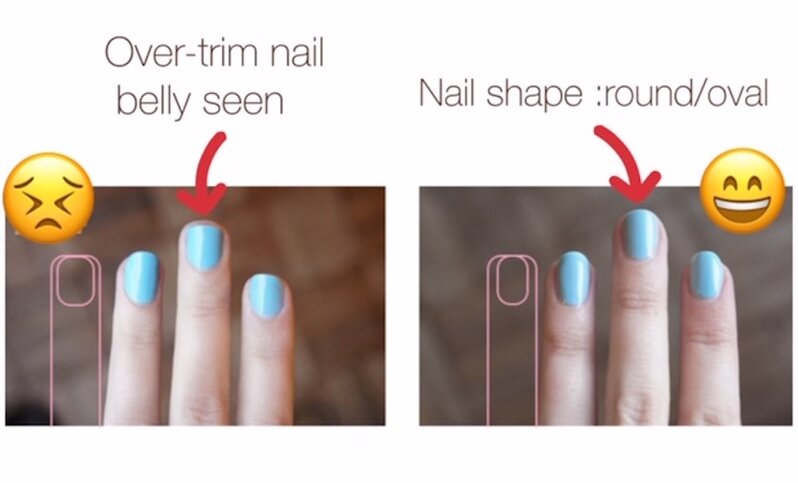
(Photo from: Rebecca, Fluttery Tips)
Faye said it's best to start by washing the hands for "a good 20 seconds" with anti-bacterial soap before actually clipping the nails. Next, clean under the nail to remove dirt using the pointy part of the nail file or cuticle stick. Once done, you're ready to cut your nails.
Faye explained that there are two kinds of nail cutting techniques. "The first way to do it is to cut the nail in one long straight shape in the middle, then cut two small ones on both sides to round it out," she said. "The other way is to make two long cuts on both sides then a small cut in the middle. Be careful not to cut it too short where the nail rests on your skin so it won’t be painful. File off the rough edges of the nail."
She also emphasised that it's important to keep your nail tools sanitised and to dry them thoroughly after use to keep them sharp.
How to deal with an overgrown manicure?
(Photo from: Shutterstock)
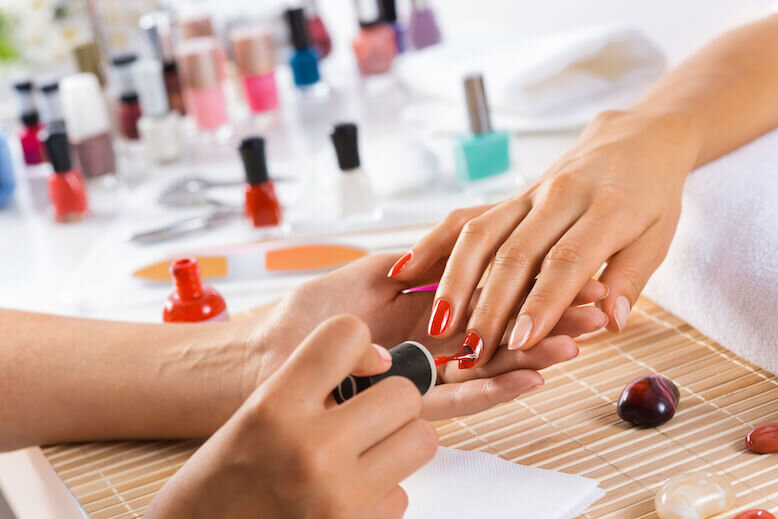
The most artistic way to camouflage overgrown manicures is to do a glitter gradient. "A glitter gradient is the easiest way to hide grown out nails, plus it looks gleeful," Faye said. "You can also do a reverse French manicure polish or just add a touch of the same polish colour of polish too from the top down if you want to make it simple."
Another way to camouflage it is to simply apply a new coat. "You may cover with any nail lacquers you have at home. But remember to apply base coat and topcoat as well," Rebecca reminded.
How to remove gel nail polish?
Some of us availed of gel nail polish without knowing that we'd be staying home for long. It's common sense not to pick on our gel polish so we don't damage our cuticles but is there a safe way to remove them? It turns out that there are.
Faye shared that there are two safe methods to remove gel polish at home. Method one requires that you buff your fingernails with a nail file to remove the shiny coating of the gel polish. "Then, soak a cotton ball in acetone until it's saturated. Put the soaked cotton ball on top of your nail, and wrap your finger in a small square of aluminium foil to keep the cotton ball in place. Check after 20 minutes if the gel polished lifted already. It will take longer since home-based acetone is diluted," she said. For those with sensitive skin, Faye advised applying Vaseline around the skin area of the fingers before the removal process.
The next method utilises warm water and a cuticle stick. "Soak your nails in warm water, or just start the process after taking a hot shower. While your nails are still wet, use a cuticle stick to push back the polish near a chipped edge. It should be easy to peel them off. Peel off as much as you can, and if any parts are stubborn, file them a little then soak with acetone," she said.
You can also just purchase a gel nail removal kit or trim nails as usual and let the gel polish grow out but Rebecca cautions that if you have any doubts, it's better to just wait. "Trimming the nails to your desired length will do the trick. But if you have any concerns, just let your professional nail artist do the removal for you after the circuit breaker," she said. "Improper removal may result in nail thinning and/or nail bed damage."
How to remove nail extensions?
Gel nail polish seems manageable, but how about nail extensions? If we need to, there is also a safe way to remove them properly but proceed with extreme caution. "It depends on what kind of nail extension is used. We have five kinds in the market today: acrylic, hard gel, gum gel, powder polish extension and glued on nail extensions," Faye said. However, she also explained that there are basic ways that can be applied to remove all kinds of nail extensions according to her. Below, her recommended methods.
Method 1: Remove Extension Nails Using Acetone And Aluminum Foil
"The first thing you need to do is to clip the acrylic nails as short as possible. Then, file off the topcoat, nail polish or any colour to avoid getting your hands full of colour. Next, soak the cotton balls in acetone and place them on your nails. If you have sensitive skin, apply petroleum jelly on the skin surrounding the cuticles. Then, cut a square piece of aluminium foil and wrap it over the cotton ball so that it stays in place. Wait for 25-30 minutes. Afterwards, remove the aluminium foil gently and the nail extension should come off with it. If you feel it still sticks, keep it wrapped for some more time. Normal acetone-free nail polish remover tends to evaporate after some time. So it is better to keep adding more nail polish remover if it still sticks. Use a cuticle oil right after you remove the nail extensions to restore moisture."
Method 2: Remove Extension Nails Using Dental Floss
"Push your cuticles with the orange sticks to make a little a place of entry. Insert the dental floss through the place of entry and move it from side to side like a saw. Continue until the nail extensions pop off. This can be a little uncomfortable. Patience is key."
Method 3: Remove Extension Nails Using Laminated Business Card
"Use an orange stick to make a little place of entry from the edges of the extension nails. Then use the laminated business card and slide it into the opening while applying gentle pressure in an upward motion. To avoid ripping a layer of your actual nail bed, do this one side at a time. And, the acrylic nails should pop off.
But again, if you're not confident that you can do these the best way is to just trim it. "For those who have concerns, cutting them to your desired length will be the best advice. Again, improper removal will result in nail thinning and/or damage of nail bed," Rebecca said. Faye echoes this sentiment, "Do not forcefully remove your nail extensions. It might pull out your real nail bed and end up in a bloody mess or infection, not to mention, it will be extremely painful," she cautioned. It seems like the best way to go is to try the methods safely, but never force it. If it happens, great. If not, this stay at home period will end anyway and it's better to wait."
How to make handmade hand and foot scrubs?
Rebecca shared her foolproof go-to recipe for handmade scrub. "Mix sugar with coconut or olive oil. You can also add therapeutic-graded essential oil such as lavender/tea tree for dry sensitive skin," she said. You can also order especially handcrafted artisanal aromatherapy hand cream and nail oil with an abundance of therapeutic-graded essential oils targeting dry sensitive skin at Fluttery Tips (via IG dm or Whatsapp) during the circuit breaker period in Singapore.
For Faye, she recommended the Honey Sugar Scrub recipe. "Sugar is an inexpensive and accessible ingredient that also does a great job of exfoliating your skin. Meanwhile, honey is an amazing ingredient with anti-bacterial and anti-fungal properties. To create this, just mix together 1/2 cup brown sugar, 2 tbsp. honey, 1/4 cup of oil you have (coconut, jojoba, olive, almond, or grapeseed).
Dealing with eyelash extension
(Photo from: Shutterstock)
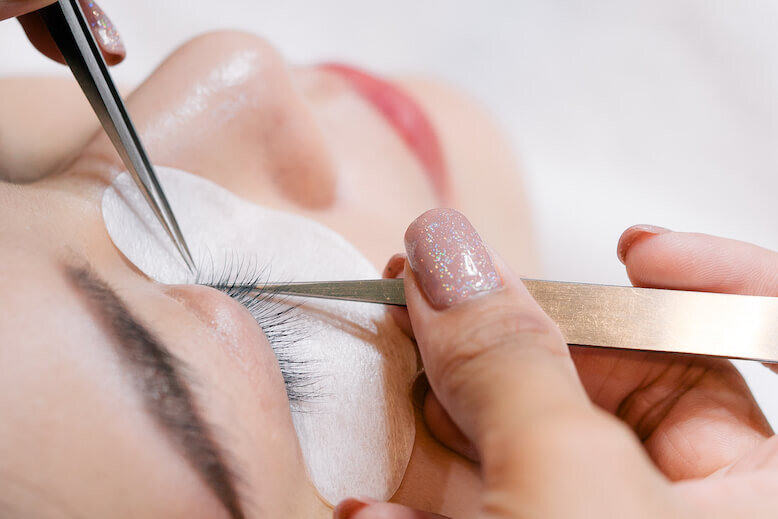
Eyelash extensions are great but they're not meant to last forever. During the stay-at-home period where we can't request for a tune-up right away, Monique Jamlang from Browhaus has tips on how to maintain eyelash extensions so they can last longer, how to remove them and other eyelash extension care tips.
How to remove eyelash extensions?
"Please do not pull them out. That's the worst thing you can do. Browhaus lashes, if you don't have it removed in our branches, just normally just fall off after more than a month. But if they're still there, washing with warm water helps. The best thing to do is to wait it out and just have them removed once movement restrictions have been lifted."
How to make eyelash extensions last longer?
"Make sure not to rub your extensions. Also, avoid direct water in the shower. We also have Browhaus Extend serum or Browhaus Undercoat lash moisturiser which can help lash growth. Your lashes are like the hair in your head, they need some TLC too considering that we put so much stuff on them like mascara."
For more guides on how to take care of your eyelash extensions, you can read our articles here and here.
(Cover photo from: Shutterstock)
Next, check out these hair care tips for this stay-at-home period.
Comments, questions or feedback? Email us at [email protected].
